We may earn a small commission from any link to any products or services from this website. Your purchase helps support our work in bringing you real information about homesteading skills and preparedness.
Homemade bread is like nothing you can buy in our American supermarkets. The supermarket breads are full of sugar, and mold fast. Homemade bread is yeasty, flavored how you like, and goes stale but not moldy. Stale bread can be used in cooking, like french onion soup or croutons or homemade bread crumbs. Moldy bread is good for nothing.
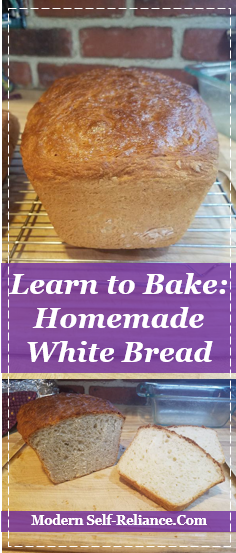
I love making fresh bread, and my family loves eating it. Here I will share my recipe and method for a basic homemade white bread recipe. It takes about 3 hours to make, depending if you use a stand mixer or mix by hand.
- A hour to mix (by hand)
- A hour to rise
- A hour to bake
And a few minutes to cool off before you can enjoy your fresh bread!

White Bread Ingredients: (yields 2 loaves)
- 2 cups HOT water
- 2/3 cup sugar
- 2 Tbsp dry yeast
- 1 ½ tsp salt
- ¼ cup vegetable oil
- 6 cups bread flour
- 2 Tbs butter
Directions
Step 1: Prepare your bowl.
Yeast doesn't like to be cold, so run your bowl under hot water to warm it. Add the HOT water, sugar and yeast to the bowl. This way, the hot water stays hot, and doesn't cool off when it is put in a cold metal bowl.
- Proofing the Yeast: If you feel your yeast may be bad or old, you can walk away for 10 minutes. When you come back, you should see bubbles which mean your yeast is good. This is sometimes called "proofing" the yeast. If your yeast is new from the store, it will likely work just fine and you can skip this proofing step.
Step 2: Add salt and Oil
Add the salt and oil to your bread. This is also the time where you can add any spices you might also like. Garlic, rosemary, Oregano work great in breads and adding them at this stage means they will be evenly mixed throughout the bread dough. Here I have listed vegetable oil, but any oil or butter works well depending on your preferences.

Steps 3: Add flour
Now is the time to start adding the flour. Mixing one cup at a time, blend the flour into the water mixture.
If you plan to use a stand mixer with your bread hooks, then you can add the flour faster. If you plan to knead by hand, as I often do, then add 1 cup of flour at a time as you mix it all in.
I usually set aside an object like a fork or spice bottle for each cup I add. This way I don't have to remember how many cups I have already added, but the bread will tell you when it can't accept too much more flour by being really hard to incorporate more flour.
- As the dough starts to get thick, continue stirring with a spoon until it becomes tough to do so. Perhaps around the 4-5 cups mark. At this point you can switch over to kneading by hand. Make sure your hands are clean and covered in flour.
- Do not stick your fingers into wet, sticky dough. This makes an awful mess. Keeping your fingers mostly together and cupped, reach under the dough lump (adding more flour if sticky) and fold the dough in half. Press the dough together with the heel of your hand.
- If you repeat this strategy while slowly turning the bowl, and the dough will become the evenly mixed, professional looking, bread dough you have seen on fancy TV shows. Hopefully your hands are not sticky, although they will have a thin layer of flour.
- Try not to over knead your bread dough so it becomes hard, or there is more flour than the bread can absorb.
Step 4: Let Rise
Set the bread out in a warm place in a floured or oiled bowl. As the bread rises it will sticky to the sides of the bowl where there is not oil or flour. The bread should rise until doubled which will be longer or shorter depending on temperature. Cover your bowl to prevent drafts or the top of your bread from drying out. This step takes about an hour.


Step 5: Split and Rise Again
Preheat your oven to 350 degrees. Now that your bread has risen, split it for your loaf pans. This recipe yields 2 normal sized loafs of bread, but if you are using smaller pans then divide the dough accordingly. Set the dough into the greased pans and let them rise another 15-20 minutes in their forms.


Step 6: Butter and Bake
Now your bread is ready to bake. Melt butter and brush it onto the surface of the bread. I use salted butter for this, but it's your preference. Bake for about 50 minutes at 350 degrees. When finished baking, brush on more butter to complete your golden crust.
- The bread will be done when you tap the top and it sounds hollow. If it still sounds dense then it needs more time to bake. For the hearing impaired, the bread will likely have risen from the pan, and will have a golden brown color. Sticking a toothpick into the bread will not work like it does for brownies, as the stick will come out clean even in dense, half-baked bread.
Step 7: Cool and Enjoy
When the bread is finished cooking, turn it out of the pans onto a cooling rack. Let the bread cool before enjoying it to prevents burned mouths. I know it is hard to resist, but let it cool a little bit! Eat it straight or top with jam. Like my favorite Cranberry-Strawberry Jam, recipe found here.
White Bread Ingredients: (yields 2 loaves)
- 2 cups HOT water
- 2/3 cup sugar
- 2 Tbsp dry yeast
- 1 ½ tsp salt
- ¼ cup vegetable oil
- 6 cups bread flour
- 2 Tbs butter
Directions
- Preheat the bowl by running it under hot water.
- Add the yeast, HOT water and sugar to the bowl. Proof the yeast if you think it won't rise.
- Stir in the salt, oil and any spices you would like.
- Gradually mix in the flour 1 cup at a time. Folding over the dough as it gets thicker.
- Let rise for 1 hour or until doubled in an oiled or floured bowl. Set it someplace warm to rise.
- Preheat oven to 350 degrees. Take the bread dough out and form into your loaf molds.
- Let your bread rise again in the loaf molds for 10-20 minutes.
- Brush the top with melted butter. Salt if desired.
- Cook for approximately 45-60 minutes. The bread will sound hollow when tapped when ready.
- Add more butter to the crust if desired, enjoy warm.
Conclusion
Share your fresh homemade bread with friends and family at your own risk. Likely they will insist you make it for every family gathering and party! I love mixing it up with different flours or with added spices. Sometimes I use butter in the bread instead of oil, sometimes I add a truck-load of garlic. Making your own bread gives you options and possibilities you just don't get with the store bought stuff. Thanks for reading and learning!
More articles of interest:

- Fitness: Working Out as Physical Preparedness - February 22, 2021
- Backpacking or 72hr bag meals - December 23, 2020
- 8 Security Concerns for a New Home - October 28, 2019


how do i printr
I have added a section at the bottom with ingredients and instructions that you should be able to copy into a word editor and print.
~Lauren