We may earn a small commission from any link to any products or services from this website. Your purchase helps support our work in bringing you real information about homesteading skills and preparedness.
Quick Reference Guide to Canning
Available through Kindle
- Chapter 1 Deciding between a Water-bath or Pressure Canner
- Chapter 2 How to use a Water-bath Canner
- Chapter 3 How to use a Pressure Canner
- Chapter 4 Common Canning Mistakes
- Chapter 5 Canner Specifications
- Chapter 6 Additional Tools
- Recipes
Why Pressure Canning?
Some fruits and vegetables are too low-acidic to be processed in a water bath canner and must be pressured canned.
Boiling water reaches a maximum of 212 degrees F before it turns from liquid to gas. For items like tomato sauce and jam, water bath canning is hot enough to kill any bacteria living there.
However, for low-acidic things like broth or beans the inside temperature must be 250 deg F. In order to reach 250 degrees, the water must be under pressure to keep the water from boiling off at 212.
This temperature be accomplished safety at home using a pressure canner.
Weighted Gauge vs Dial Gauge
I use a simple Mirro pressure canner with a weighted gauge. (It looks like my model is discontinued and has been replaced by this one. But I can still get replacement seals and weights as they are more universal.)
Some canners have a dial gauge however this can drift over time and need to be inspected once a year by someone who knows how to test pressure canners.
I am sure these pressure canner inspectors are few and far between, so don’t trust the dial gauges. As a note, most canners with a dial gauge will also have a weighted gauge so use that one.
However, with the weighted gauge you need to be able to hear it rattle, so for the hearing impaired the dial gauge would be necessary.
First things first: Safety
- Always use an approved canning recipe. It will tell you how long to process at what pressure and how much headspace to leave in the can. This will also confirm that you are able to safety can what you want. (By use a recipe, I mean if you are making broth use a broth recipe however if you want to use different spices that won’t change things.)
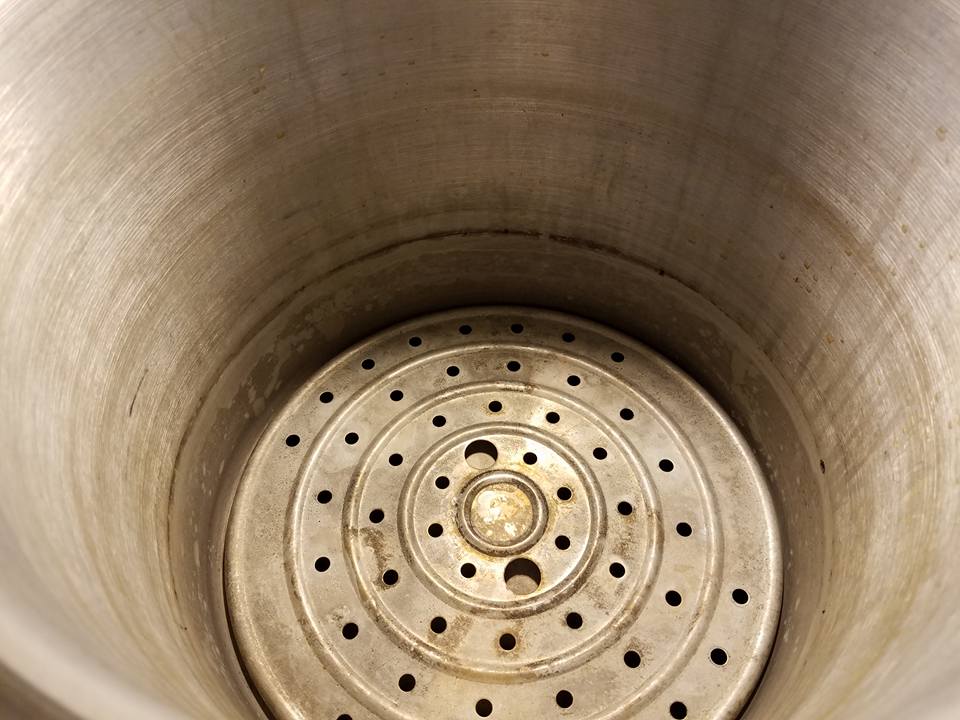
- Ensure your rubber seal on your pressure canner is not cracked or old. The seal should be oiled every other use or so to keep it in good condition. (Not all canners have rubber seals, some are metal to metal seals like this one.)
- Do not remove the weighted gauge by hand, it will be very hot!
- Do not attempt to remove the lid while the canner is under pressure. (Obviously, it filled with super-hot water/steam.)
- Your canner should have a safety release valve, ensure that it is not corroded or blocked.
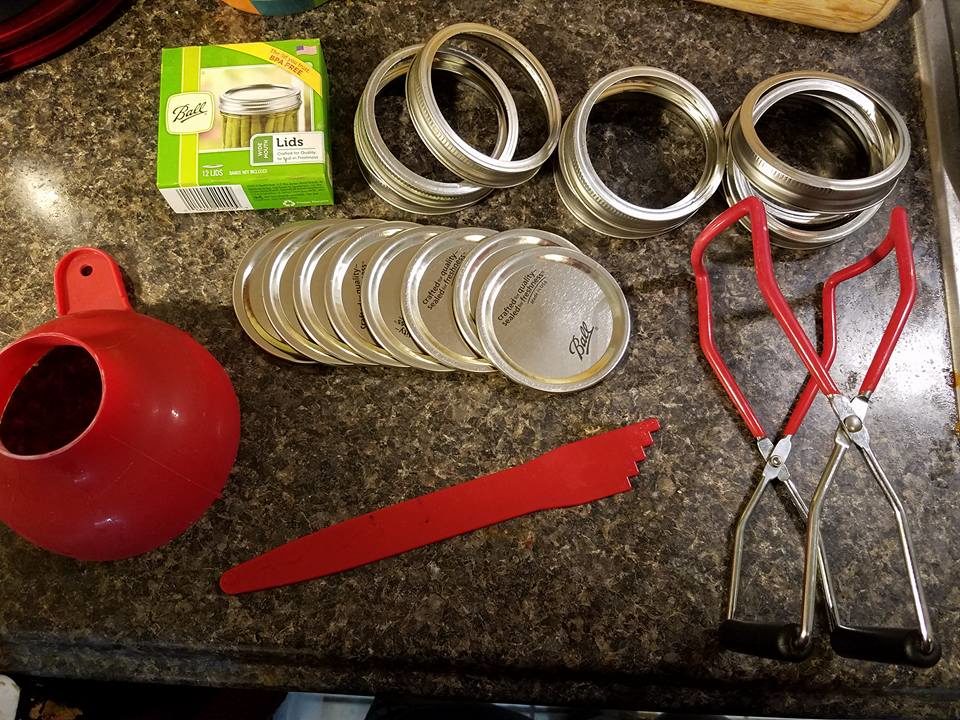
The tools are nearly the same as water bath canning, with the introduction of the pressure canner.
- jars, lids, and bands
- pressure canner (spacer racks, seals + weight)
- jar lifter (tongs)
- headspace ruler
- magnet on a stick
- funnel (optional)
Steps to safety pressure can:
- Fill your pot with 2-3” of water and place your jars inside. It will not have to cover the jars. Turn the heat to high, to start to boil the water. Add a little vinegar to the water to prevent haze from hard water from accumulating on the outside of the jars. (Purely for aesthetics.)
- Place your lids in a separate smaller pot and bring to a simmer to prepare the seals.
- One jar at a time, remove the jar and fill with my homemade beef broth. Many articles will say that the broth (or other items) must be hot before jarring, but I don’t see the need for safety. The contents of this jar will get to 250 deg to kill all bacteria regardless if I start with hot broth or not. I believe the advice comes from putting cold liquid in a hot jar, then putting the hot jar in hot water. This might break the glass from the shock of temperatures. However, if you fill the jars as you bring the water to boil then everything will come to temperature together and there will be no glass temperature shock.
- Ensure the proper headspace as listed in the recipe and wipe the seal clean. Beef broth requires 1” of headspace. Proper headspace ensures proper sealing of the jar. Ensure there are no trapped air bubbles in the jar (more of a problem with chunky items). Choose a lid from your simmering pot and center if over the jar. Tighten the band to be “finger tight”, meaning just until the threads start to catch.
- Once all jars are filled, let the water come to a boil. Check that there is still 2-3” of water and add more hot water is needed. I will add up to 4” for longer recipes, when more water will be boiled off.
- Once the water is at a rapid boil, put the top on. Ensure the seal is not leaking. If your seal is not seated properly, steam and water will leak out shortly and you will notice. You should start to see steam coming out the top like a little train engine.
- Let the pot continue to boil rapidly for 10 minutes once steam is coming out steady from the top.
- Take a deep breath and add the weight to the top. Yes, as you place the weight down, you will feel the steam and hear a hiss as the steam is stifled under the weight. This is normal but may be a little disconcerting the first few times. My weight has the ability to do 3 different amounts: 5, 10 and 15 pounds. Most recipes are written for 10 lbs of pressure like my beef broth, however if you live at high altitude things may change. My favorite Ball Blue Book has all recipes written for 10 lbs of pressure.

- Now wait for it to begin to rattle (or dial gauge comes to 10lbs only for those who are hearing impaired). How long to wait before it rattles will depend on how full your canner is and the efficiency of your heat source. Note: Sometimes the weight can get stuck and a slight tap will release it and it may start to rattle. So tap it with a fork if you feel you have waited too long. Do NOT touch the weight barehanded, it will be hot!
- Once the rattle starts, turn down the heat. This will take some practice, you want to turn the heat down so that the rattle occurs 3-4 times a minute. For me, this is somewhere between 3-4 on my 0-10 electric stove. If it rattles too often, the pressure inside is too high and could cause your food to cook too much and get mushy. If it rattles too little, the pressure inside is too low and the temperature too low and may not safely kill all the bad stuff. This step requires a little patience, as the rattling can get quite annoying.
- Once the rattling starts and you have turned down the heat, start your timer per the recipe’s direction. Beef broth is processed for 20 minutes for pints and 25 minutes for quarts. If you are processing both pints and quarts, choose the longer time.
- After the timer rings, turn the heat off. Do not remove the weight or try and move the canner. You could go to bed if you are canning late at night and finish the next morning if need be.
- When the canner as returned to normal pressure, remove the weight with a fork or pot holder. Without a dial gauge this may be difficult to tell, but if you tap the weight it will hiss if there is still pressure inside. You do not want to rapidly depressurize the canner, it’s just not a good idea.
- When the canner weight is removed and the lid is no longer under pressure you should be able to lift it off with pot holders. If the lid feels like it has pressure under it and is hard to remove just wait. Place the lid someplace out of the way to cool.
- Remove the cans from the water with jar lifter or tongs. The contents of the jars may still be boiling away inside. Take a moment to enjoy your little lava lamp looking jars. Do NOT tight the bands while hot, this will may them hard to remove.
- You should hear the satisfying “ping” of the jar lids being sucked down. They will be properly sealed when there is no play in the lid. Do not touch them barehanded, remember it’s boiling inside! Leave the jars out to cool completely before labeling and storing. Properly sealed jars will last for about a year, but this is more for quality sake than safety.
If a jar fails to seal properly, put it in the fridge and use it first. Or you could try resealing with a new lid.
Lastly, now you are ready to make some beef stew with your broth, how the heck do you open the jar?
- Remove the metal band.
- Put a rag over the top of the can, and grip the can from the top. Do NOT grip the can like you are opening a jar of pasta sauce on the side.
- With a butter knife (not a sharp knife), find a spot on the jar where the lid hangs out slightly. There will be easier and harder spots to open from.
- Wedge the knife up under the seal and twist gently until you hear the seal break and air is sucked in.
- Remove the rag and you should be able to lift off the lid.
Why do I recommend this method? When your knife to breaks the seal the pressure from the knife is upwards. If you do not have your hand on the top of the jar, when you break the seal the lid is also under pressure and it will fly (!) off your can, splattering the contents everywhere.
The first time did your pressure canner make you think of a steam engine ready to explode? Mine sure did but practice builds confidence. What are your favorite canning recipes? Thanks for stopping by!
Pressure canning still too complicated for you? Start by water bath canning your favorite jam first.
- Fitness: Working Out as Physical Preparedness - February 22, 2021
- Backpacking or 72hr bag meals - December 23, 2020
- 8 Security Concerns for a New Home - October 28, 2019


Leave a Reply