We may earn a small commission from any link to any products or services from this website. Your purchase helps support our work in bringing you real information about homesteading skills and preparedness.
My good friend Sam shares her experience with raising chickens for the first time:
First of all, let me just say, raising chickens is a lot easier than I thought it would be. I didn’t grow up on a farm, and I’ve never raised any kind of livestock, unless kittens count. I don’t even do that well with plants. So, how did I end up buying 10 little peeping chicks this past February?
Long story short, my parents bought a farm in southern Virginia and needed a farm-sitter for the winter. So my husband and I moved across the country to try life on the farm and start getting things ready for the family to move in this spring. They wanted chickens, so we volunteered to get them started so everyone could have fresh eggs this summer.
Here’s 5 things I learned about raising chickens and why I think you can do it, too.
#1 You Can Get Everything at the Store
Where to find supplies:
Farm supply stores have everything you need to start raising baby chicks, even the baby chicks themselves. Stores like Tractor Supply, your local farming Co-op, North 40 (in the west) and other stores where you’d find things like horse feed, pesticide spray kits, overalls and rubber boots, and chainsaws. These stores buy chicks from the factory in big batches starting in March.
You just call and ask when the first shipment is coming in. We didn’t really have any idea what breeds we wanted except that I know Rhode Island Red hens are the best egg layers [because I’m from RI and it’s the State Bird (yes, it really is)]. No need to worry, you don’t have to start researching the thousands of chicken breeds to make a good decision.
Choosing Peeps:
We walked in and they had the chickens in metal horse troughs with their food and water and a heat lamp hovering over them. They are so sweet when they’re only a day old! The little fluffballs were just wandering around, peeping quietly. Each trough had the name of the breed and a little description, as well as statistics about how good of an egg layer it was (Good to Excellent), how soon it matured (Average to Very Early), and what kinds of “raising” it was best suited to (Commercial brooders, pasture raised, free-range, etc.).
Our Chicks To-go:
So right there you have all the information you need to make a good decision. If you’re indecisive like we are, you might decide to get a few of each. We ended up with 4 Black Sexlinks, 3 New Hampshire Reds, 2 Barred Rock, and 1 Aruacana. The first 9 are very good egg layers and early maturers, and the Aracauna lays little blue eggs which we thought would be fun. They had carrying boxes for them in the store for free (like a McDonalds Happy Meal Box, which is a bit disturbing). So we put the 10 of them in 2 little boxes to take home.
Chicks on the cheap:
Although we went ahead and bought everything else we needed for the chicks before going to the store, you really don’t need to. They have everything you could possibly need. Feeders, waterers, heat lamps, pine bedding, food, nutrient supplements, thermometers, brooder containers and walls, and even kits to build an adorable little henhouse shaped like a barn for when they’re a bit older. We weren’t up for spending a whole load of money on the little gals though (the point is to save money with “free” eggs). So we made do, skipped a lot of stuff, and stuck to the basics.
Healthy chick checklists:
Tractor Supply even had very handy pamphlets and booklets for free that have the basics of what you need (in checklist form) to raise chicks. They go week by week with what you can expect for their growth and development and what you need to do to keep them healthy and happy. You could walk in there, having never even seen a chicken before, and walk out capable of raising baby chicks.
People have been doing this for thousands of years (probably), so don’t let it intimidate you.
#2 You Don’t Need All That Fancy Stuff
DIY Brooder:
The store wants to sell you a lot of gadgets and doodads meant to make raising your chicks easier (or cleaner, or faster, or something). There are a lot of different options with different pros and cons for what type of brooding container you can use to keep your chicks warm and safe for the first 4-6 weeks.
I decided to be a real Swamp Yankee and just use whatever I already had that would do. My parents would have disowned me if they saw me buying one of those expensive brooder kits.
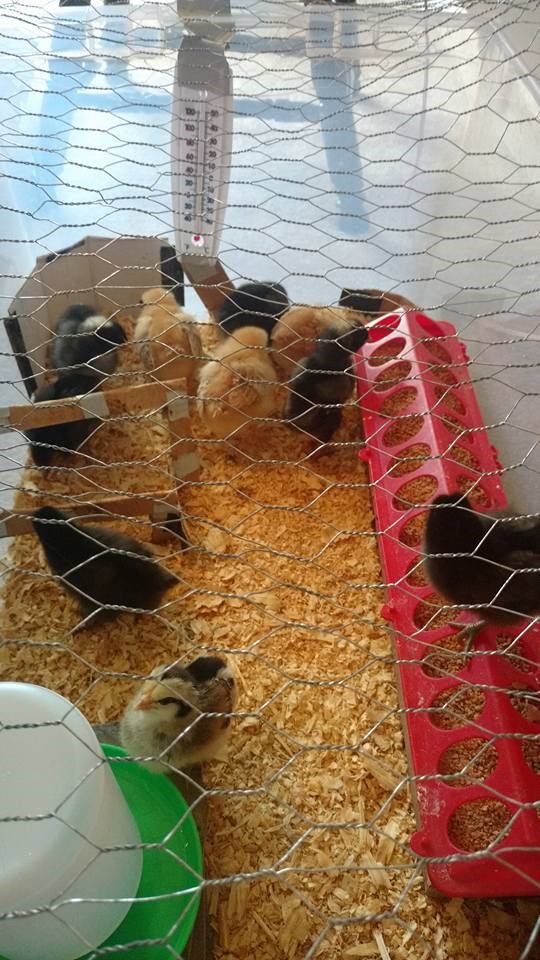
We raised our chicks in a clear, plastic storage tote for the first 4 weeks of their lives. It was one of the extra big ones, but we just took it out of the shed, removed the winter boots that it had been storing, and dumped some bedding in the bottom.
The plastic $5 waterer and the plastic $7 feeder went in the bottom as well. The $9 heat lamp is a must, but we just hung ours off the back of a chair to get the right placement in the tub. The $7 thermometer got duct taped to the side of the tote under the lamp. Voila. Ready for chicks.
Chick Brooder vs Kittens:
We put the tote and chicks in an empty bedroom, mostly to protect them from curious kittens, but also to keep any noise or smell from bothering us. In actuality, there was very little noise or smell to worry about. When they got a little older we had to put a strip of chicken wire over the top to keep them from accidentally jumping out, but that’s all they needed. The medicated food we bought at the store (just a little bag), and the water came from the tap. It’s even easier than most other animals because they stayed in the tub. The kittens definitely caused us more trouble than the chicks.
#3 Set It and (Almost) Forget It
Refresh water and food:
Once the chicks are in their tub, with food and water and the heat lamp keeping them at the right temperature, there’s really nothing else you need to do. I cleaned out their waterer every day because they’re always stepping in it and (unfortunately) pooping in it. To be honest, all I did was rinse it and refill it. The book says to use soap or vinegar but I didn’t bother (bad chick mom). I refilled their food when it seemed to be getting low.
Week by Week:
Every week we moved he heat lamp to lower the temperature in their tub, added some more bedding to keep things fresh, and raised up their food and water dishes to keep them at beak-level. I used leftover tiles I found under the porch to raise their food and water dishes, and eventually a brick. They get less mess in their water if it’s a little off the ground. All of this is explained very clearly in the pamphlet we got at the store.
Look out for possible problems:
We were diligently on the lookout for any of the number of terrible things that can happen to baby chicks (disease, malformation, malnutrition), but we never saw anything. They just ate and slept, peeped, chirped, and pooped, and sometimes chased each other around the tote. It was adorable, but they really didn’t need much attention from us. I like to think they were pretty happy.
#4 Chicken Coops Can Be Basic AF
No Fancy Coops on this Farm:
I’ve seen those little chicken coops in the backyards of suburbia that look like tiny little barns or houses and stand on stilts with a chickenwire run underneath. They’re adorable, they don’t take up much space, and they’re perfectly designed to make cleaning and egg collecting easy while keeping your chickens safe from predators. They’re also $$$. We don’t have $$$. And if we did, we wouldn’t spend it on our chickens (hello, backpacking gear).
The Basics:
The point is, the requirements for a chicken coop are basic. It needs to be predator proof. There needs to be an “indoor” space with walls, a floor and a ceiling so they can keep warm and dry in any weather. You want it to be tall enough to walk into, or high enough above the ground to easily reach into. Every adult chicken needs 2.5ft2 of space. You might want to give them a fenced outdoor area to be, since they’d really like that and so will you. They’ll eat bugs and save you money on food as well as keep bugs away from your house. Other than that…. Whatever works.
Our Old Shed:
So we built our larger, permanent, chicken coop inside of one of the old sheds on our property. We live on a huge, mostly abandoned farm so we’ve got plenty of old barns and sheds to choose from. You can probably use part of a garden shed, a corner of the garage, or make a lean-to up against your house or garage.
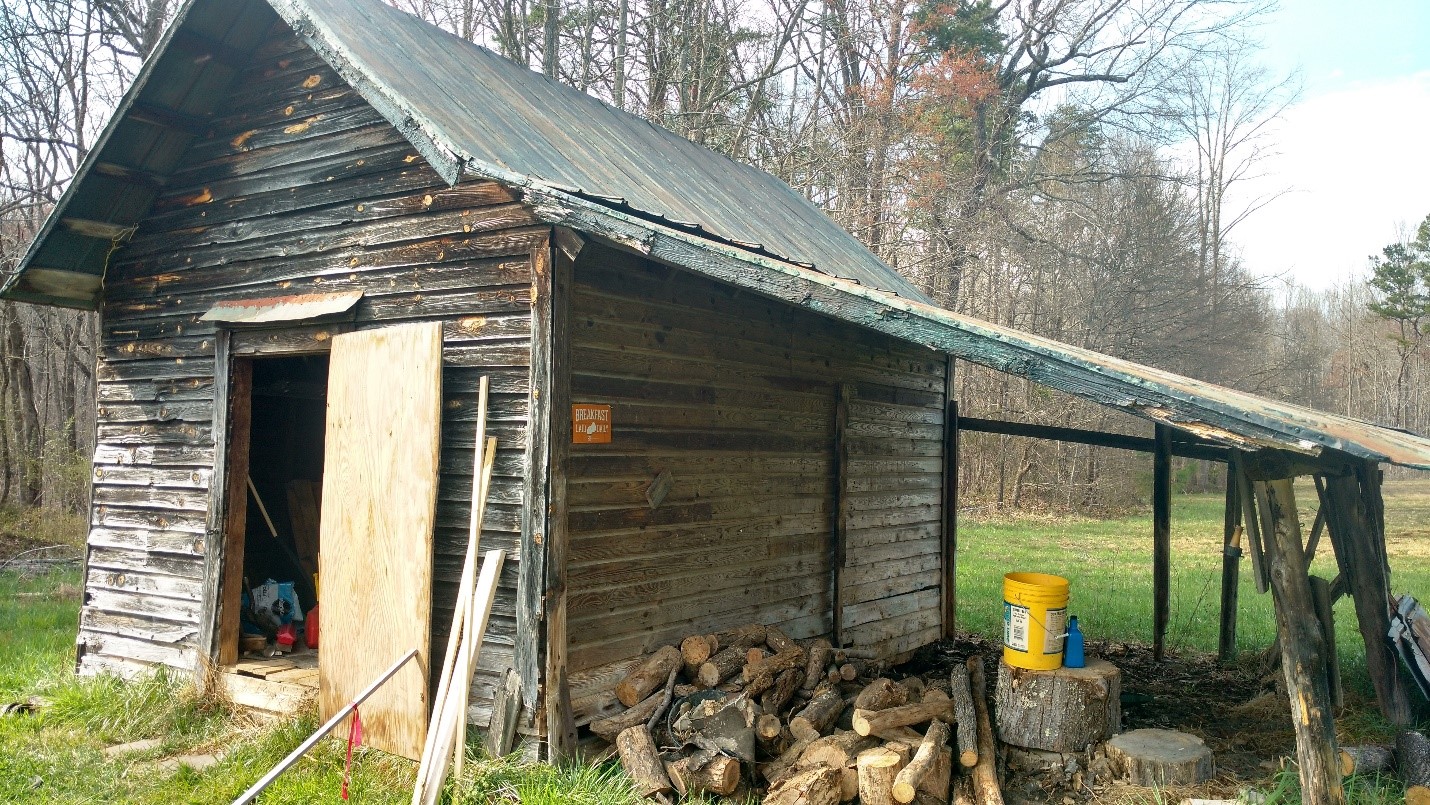
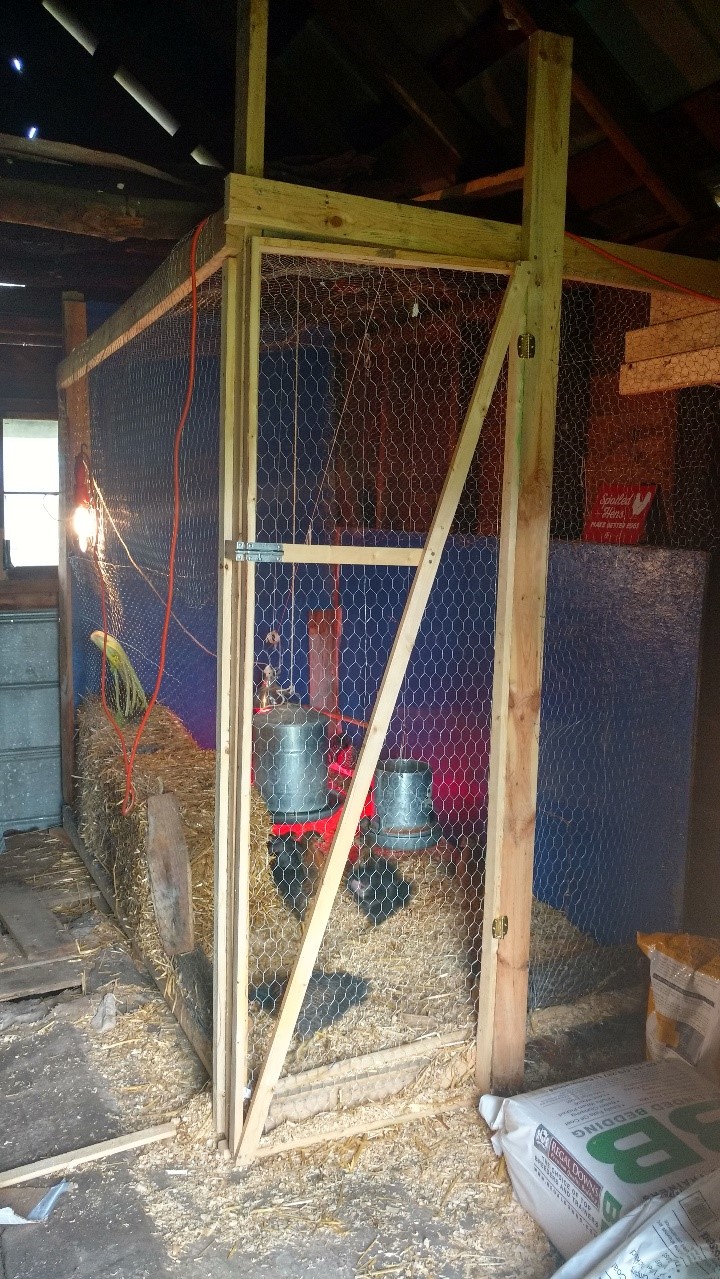
Ours is inside of an old shed, but there’s no way we can make that falling down building safe from predators. So we built a chicken-wire cage inside the shed using plywood and 2x4’s for the frame. It’s big enough to stand up in, has enough square footage for all 10 chickens, and the chicken wire is going to keep out anything that wants to eat our birds.
It took some time to get used to working with the chicken wire and fencing nails and all that, but it doesn’t need to be pretty. Or symmetrical. Or even at right angles. Really, the chickens don’t care.
We picked a place to build an outdoor pen for them as well, but we haven’t done it yet. They’re too little to be outdoors right now (too cold) so we have some time to finish that part.
Transitions from Brooder to Coop:
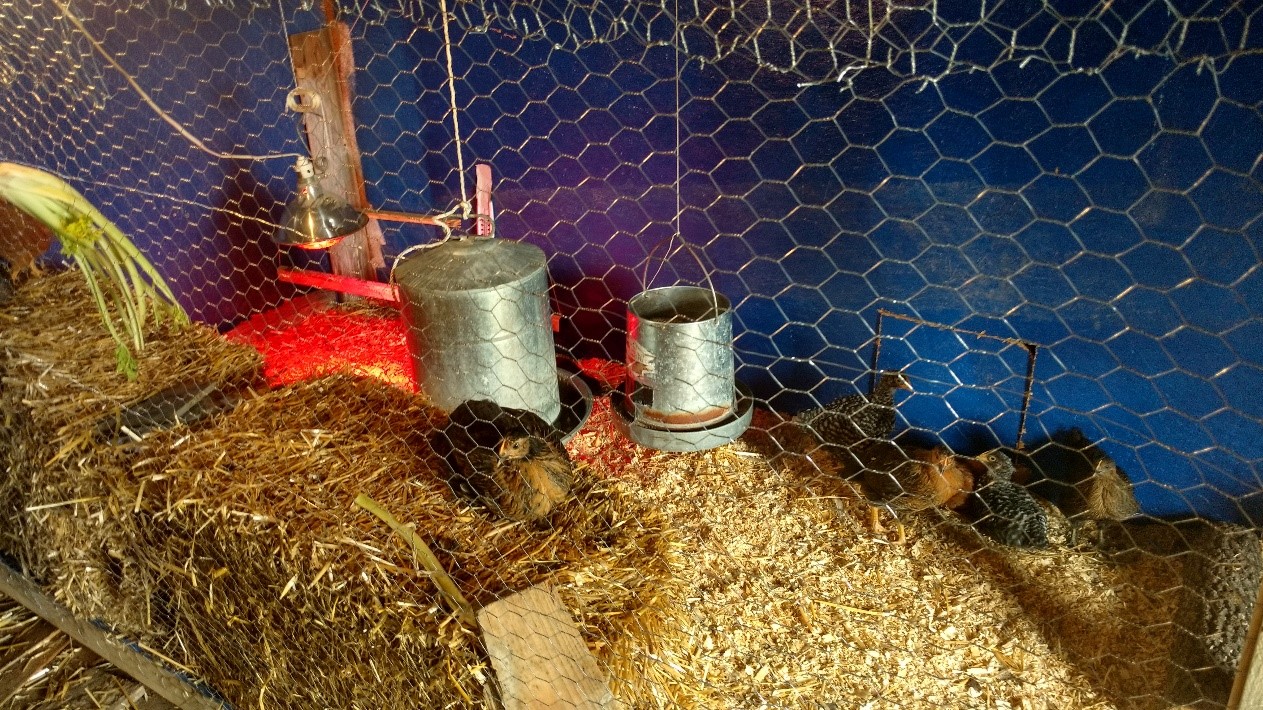
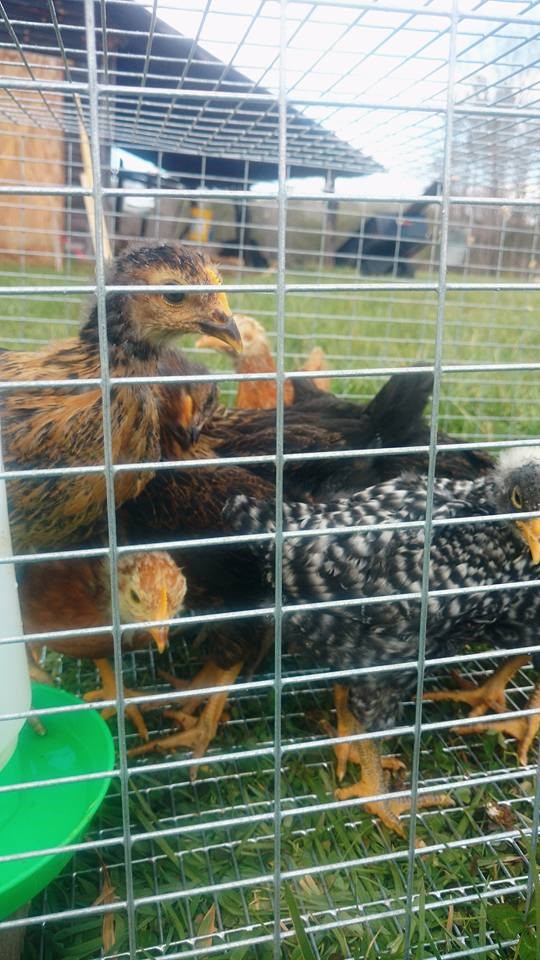
When they got too big for their tote, after 4 weeks, we put them outside for the first time. It was a little nerve-wracking, since it was still getting down to the 20s at night. But with a few hay bales stacked in a square to keep out drafts, and the help of their heat lamp, they were cozy warm.
Over the next few weeks they got more feathers and we expanded the size of their hay bale enclosure until they had access to the whole coop. Now they’re almost 6 weeks old, totally feathered, and we’re almost ready to take the heat lamp away.
Daily check-in:
It’s the same thing now as before. I check on them every day, just to see that’s they’re all okay, but they don’t need anything. They’ve upgraded to a 5 gallon metal waterer and a 5 lb metal feeder (hand-me-downs) that are hung from the ceiling at beak-level. The food and water only need to be refilled once a week or so.
The waterer doesn’t need to be cleaned out as much because it’s high enough that they can’t get into it to make it dirty. I prop the shed door open for the day to give them fresh air, count them to make sure no predators somehow got in there, talk to them a little bit, and walk away. At night I close the shed door. That’s all. Very low maintenance.
#5 They’re Fun!
Raising these chickens has been really fun for us! They’re so stinking adorable as little chicks, you just want to snuggle them (but you shouldn’t). We spent a lot of time watching them run around and listening to their little happy peeps. They grow so quickly that you get a lot of satisfaction in raising them, watching as they get bigger and more feathered almost every day.
You can see how your efforts to care for them are having an immediate effect. As they got older and stopped sleeping as much, they became very active. They flap around, peck at things, chase each other, fall over, accidentally step in the water and get scared, fall asleep standing up, and in general be clueless little babies. It’s prime entertainment.
In Conclusion
Now that they’re older, my 5 minute check in the morning often ends up taking 20 minutes or more because I always end up watching them, talking to them, and trying to get them to eat canned corn out of my hand. You wouldn’t think it, but they have different personalities. Since we have so many breeds, it’s easy to tell them apart and watch them develop. There’s a few very daring ones that always come over while the other run away.
There’s a few that are always sleeping under the lamp, lazy birds. My favorite, little Arrow, who is going to lay blue eggs soon, is a trickster and likes to steal the other chickens food and run away with it. I love these little chickens and, now that they associate me with yummy treats, we have something of a relationship. I can’t wait until their old enough to be let out to roam the yard. It’ll be another 4 months before they start laying eggs, but I’m excited to see them trundle around the yard as adult hens, cleaning up the ticks and chiggers and unwanted pests from around the garden.
They’re so easy to take care of, so fun to raise, and such a great source of free eggs, that I honestly can’t see why anyone that Could have a few hens Wouldn’t want them.
So, if your HOA or apartment or parents will let you, a few hens won’t take up much space and you’ll love having them. If they won’t let you, you might be able to change their minds by showing them examples of successfully innocuous suburban chicken coops around the country. You can save money, get back to the land a little bit more, and enjoy having a few more animals around all at once.
What was your experiences raising chickens for the first time? Share you story below.
Read more:
- 5 Things I Learned Raising Chickens For the First Time - May 5, 2018


I laughed so hard about your “right angle” comment….which, while true, it is easier to put up the chicken wire (which is made with a straight edge) if you are putting it on a straight edge.
When you make your “run” for your chicken’s outdoor time, make it tall enough to walk inside. I didn’t (at first) Almost within the first week they were out they laid an egg out there and I had to unscrew the top and get a ladder, climb in and retrieve it. (Lots of fun. NOT) You don’t want them to discover, accidentally, that what is inside the shell is yummy or you will create egg eaters in the flock, whom will in turn, teach the other to eat the egg they just laid….so removal of the egg accidentally laid in the run is important.
I also had to laugh at your comment regarding raising chickens yielding “free eggs”. My first egg cost $1200. There was the coop. Vinyl sided to match the house. Then the feeders and waterers I hated and replaced. Then the outdoor run with welded wire (hardware cloth) sides at the bottom so the raccoons couldn’t reach in at night at yank the heads of the chickens through the chicken wire and bite them off. Then the revamping of the roosts because 1/2 chickens didn’t like them so stayed on floor all night and the other half pooped on them. And the food at $11 for 50 pounds. (It is now $14 ) 4 months of that before they laid one single egg. There is no such thing as a free lunch, or breakfast for that matter.
I wish I had been clever like someone else and saved the first egg each of my birds laid by blowing it out and drying it….I saw someone’s all kept in mason jars in her kitchen….kinda like marbles, but first eggs. (and if you blow it out, you can still EAT it…just not sunny side up)
We probably spent about $300 on our chickens between getting them and their first egg. I guess we got lucky with having a lot of free resources. We were able to re-use the old shed and a lot of the materials were scavenged from other old buildings and scrap piles on our property. Our roost is just branches from the woods. We really only paid for the wire, and we got it at a Heavy discount from my husband’s work. And the food, of course. The feeders/waterers/light we got from a friend, and of course we did all the labor ourselves. Scrap wood isn’t the easiest to work with, so that accounts for the not-too-pretty state of the coop itself.
Of course a lot of that is up-front costs. We won’t have to build a coop or buy equipment every year. We’ll basically only be buying the chicks and their food. And we cut down on food costs by letting them out in the yard. If you feed them less, they don’t lay as much, but I honestly don’t need 10 eggs every day, so that’s not a big loss for me.
PS Be sure to add vinegar to the water you boil eggs in or you will NEVER get the shell off…they are too fresh to shell properly without the vinegar.
Cass,
Thanks for the tip. We definitely noticed the shells are a lot thicker when we switched to farm eggs from conventional store eggs. I don’t boil eggs often, but come Easter devil-egg time I will keep this in mind.
Thanks for sharing,
Lauren